Wednesday, July 23, 2008

Fun Stuff :)

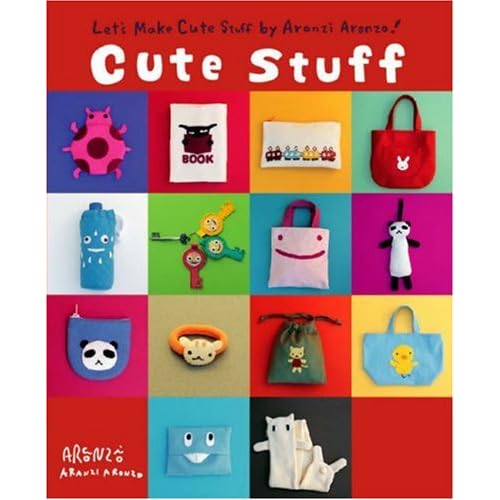
I got the two cutest books last week and I've been having some fun with them. I got:


and


Here's what I've made so far:
This cute tree:


A keychain


and I've also made some pincushions - the strawberry pincushion wasn't in the books, but one I made for fun - just playing around. The flower pincushion was made with a simple pattern in the book for the "x" shape and I cut a flower from my sizzix to put on top with a button.

These are just way too fun to make and totally addictive!

On to something else............

Do you want to win some scrapping goodies?????

Well, head on over to My Creative Scrapbook for the Sizzlin' Summer Contest! All the details are here: Sizzlin' Summer Contest. Many prizes will be awarded for best layouts in the different categories with one BIG prize for just posting comments on the message board! CHECK IT OUT!

Oh, another thing, I had some good news last week - I had a project picked up for the Dec/Jan issue of Digital Scrapbooking Magazine AND ...... I was named the new Hybrid Editor for The Insider at Digi Shop Talk! If you don't get The Insider, its FREE so go download it now! If you're not a memer at DST, you'll want to register on the site to access the downloads. Pretty exciting (and a little intimidating knowing that over 15,000 people get The Insider each month - eek).

That's about it for now. Hope you have a great week! My daughter's 8th birthday is this Saturday so we'll be celebrating - Yippee!

Saturday, July 12, 2008

A few projects to share :)

Got a few things done the past couple of days. Everything here is for Sweet Shoppe Designs (LOVE THEM!!!).

I wanted to make a birthday box with this adorable birthday kit called It's My Party by Christy Lyle. I made a tag to go with it but it wouldn't fit with that honkin' big bow so I left it off :)


This next one was a bit of an experiment - I saw this kit by Dani Mogstad. Its a pre-made album kit for a round coaster album. I added my photos and printed four of the pages (and cut them out). I attached each of the circles with ribbon at the sides. I added a bottom and handle and made a basket. The photos make it look a bit wonky, it looks better in person. Didn't really make the basket to hold anything, just a "memory basket" I guess - I'll put it on the shelf in my craftroom.


I made this card using a layered digital template (see below). Really easy if you've never used one, just drag the digi papers over onto the template and drop them in place. I wanted to make it hybrid so I printed out the different layers separately for the card, cut them out and added them back to the card - to give it dimension. I also added some lace.


Here's the template I used and the envelope I made with the template is below:


The last one is a card I made with Dani's MVP Kit. I made another project with this same kit last year (I'll post photos below). The more I look at this kit the more potential I see. My daughter plays/has played basketball, soccer and volleyball - I was thinking it would be fun to make up some "baseball cards" (you know, like the trading cards) for her with the different sports (another idea to add to the super-long list).


Here's the other project I did with this kit last year - this was an altered shoebox to hold her first pair of basketball shoes (I loved those pink Converse Chuck Taylor high tops!!)


Well, that's about all for now. Hope you have a great weekend!

Wednesday, July 9, 2008

My Creative Scrapbook

The July Kits are up at My Creative Scrapbook! I've got a few photos of the album that I did for the July Album Kit. I wanted to make a little album about some of the things our freedom allows us that I am grateful for (in the spirit of Fourth of July).


That's about it for now - Have a GREAT week!

Sunday, July 6, 2008

I'm Finished!

I've been reorganizing and decluttering my craftroom (well, a little - didn't get rid of as much as I intended). I'm pretty much finished except for reorganizing a few cabinets and painting a big cabinet which I'll be doing next week. I've got a few photos below but have a bunch more here if you want to take a peek: My Craftroom


(click for larger images)


I'm just so happy to feel a little more organized :) Today I start the same process in my daughter's bedroom - eeks!
Hope you're having a GREAT weekend!

Thursday, July 3, 2008

Fourth of July!


Made a little Fourth of July Candy Bouquet. I found the star box at AC Moore and covered "fun size" candy bars to make the bouquet. I used this adorable kit by Heather Roselli & Darcy Baldwin called Freedom Rocks from Sweet Shoppe Designs.

Here are a few more pics of the box:


Well I started the daunting task of re-organizing my craft room. I do it about once a year. I've had my eye on this storage rack from Sams Club for a long time now, but was hesitant because it didn't have the "cuteness factor" I was looking for :) But, it is really big and holds a LOT so I caved and got it yesterday. It comes with 18 plastic bins sized 10.5"W x 14"L and the whole thing is 54"H x 36"W x 14"D.

And now, I LOVE IT!!! I started loading it up last night - I can't believe how much each of the bins hold. I'll take some photos once I get things back in order - its chaos in here now.

Here are some "before" photos of my craft room that I took a few months ago:

I'll be decluttering this wall - its gotten too junky. I got rid of the tall white plastic cart - moved all that stuff into the new storage rack I got.


Also got rid of the brown cart under my desk (next to the black chair)


I put the new storage cart with bins here where the wood shelving is in this picture (got rid of the wood shelving). This photo also shows the entrance into the HUGE walk-in closet attached to my craftroom - I reorganized in there too and THAT was the tough part - that took an entire day and I'm still not done. That closet is the size of a small room (you can see it even has its own window in there - lol). I have wall to wall shelving on three of the walls in the closet and it is packed full of craft stuff (its a sickness, really).

I took down the shelves and everything off the wall here and am putting up three rows of uniform white shelves - "L" shaped to fit around the corner. Hopefully it will be a LOT less junky.

So, I have lots to do and will be busy, busy this holiday weekend working on my little re-organization project. Whatever YOU do, I hope you have fun! Happy 4th!

Thursday, June 26, 2008

A fun gift idea...

(Click for larger image)


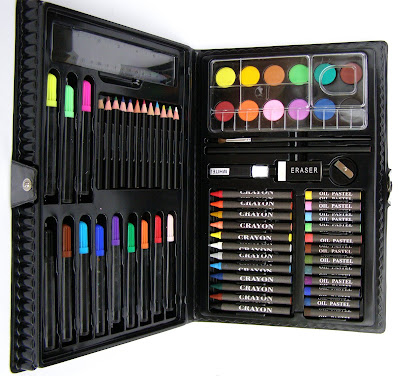
I've been making these for years - this is one of my favorite gifts to give kids because kids typically love art and I love to encourage them to create art. You can get the art cases from the craft store and whenever my daughter gets invited to a birthday, I typically do one up as part of the gift. For the past two Christmases, Michaels (craft store) had the art cases on sale - they had them on sale several times but during one sale they had them for $2.50 each so I bought a whole case of them!
Here's what the cases look like "before" and I have another photo of the inside:


There is a clear plastic cover on the case so I use an exacto knife to carefully cut into the plastic on one side of the case. You have to cut really close to the edge so you won't see the cut. After cutting, the prepackaged cover slides right out and you can slide your new cover in. I use a little bit of ashesive to hold the plastic back down, again just on the very edge and just a little so its not noticeable.


To make the cover insert on this project I used an ADORABLE digi kit from Sweet Shoppe Designs, called Squiggle It. It was PERFECT for this! Here's a peek:

Isn't that cute??!!

I had some good news this month - I had Scrapbook Dimensions ask for a project, Bella Scraps published two of my projects this month and Scrapbook News and Review ask for two projects for their July issue. That's always fun :)

That's about all for now....I can't believe June is almost over - where did the time go???!!!

Monday, June 16, 2008

July 4th Treats


This was probably the quickest and easiest project I've ever done. I could have done a lot more with it, but I wanted it to be quick and easy so that is how I approached it. I'll be making more of these but here's the first one - its a July 4th Treat Bag. I filled the bag with "Red Hots" (cinnamon candies). For the bag topper, I used a pre-made digital page and just inserted a photo. Here's the digi kit with the pre-made stars that I used: Liberty & Justice: Mini Star Album by MandaBean.


This kit is made for making a mini-album, but I like to "think outside of the box" and see what else I can do - you know, to get more bang for your buck ;)

I found the little red bags at the craft store (you may need to make the star a little larger when you print it out depending on what size bags you get). I printed the star out on cardstock, cut it out, and used brads (I put a little sequin with my brad) to attach it to the top of the bag (I also folded the top of the bag down a bit prior to attaching the star with the brads). Here's a photo of the back of the bag, to show how the brads attach the star:


The two sayings at the bottom of the bag also come in the digi kit. I just cut them out and used glue dots to attach them to the bag. That's about it - SUPER EASY and a great "starter" hybrid project too - Let me know if you try it out!

Tuesday, June 10, 2008

A few things and a CHALLENGE!

Got a few things done for Sweet Shoppe Designs:


Made a card using this: Blossom CD Album Kit. Instead of making the CD album, I used one of the pages for a card front. It was sooo fast and easy!


Found these plastic buckets at Party City and used this kit from Eva Kipler to made a "Girl Stuff" bucket for dd to put her girly trinkets (hairbows, bracelets, etc....) in.


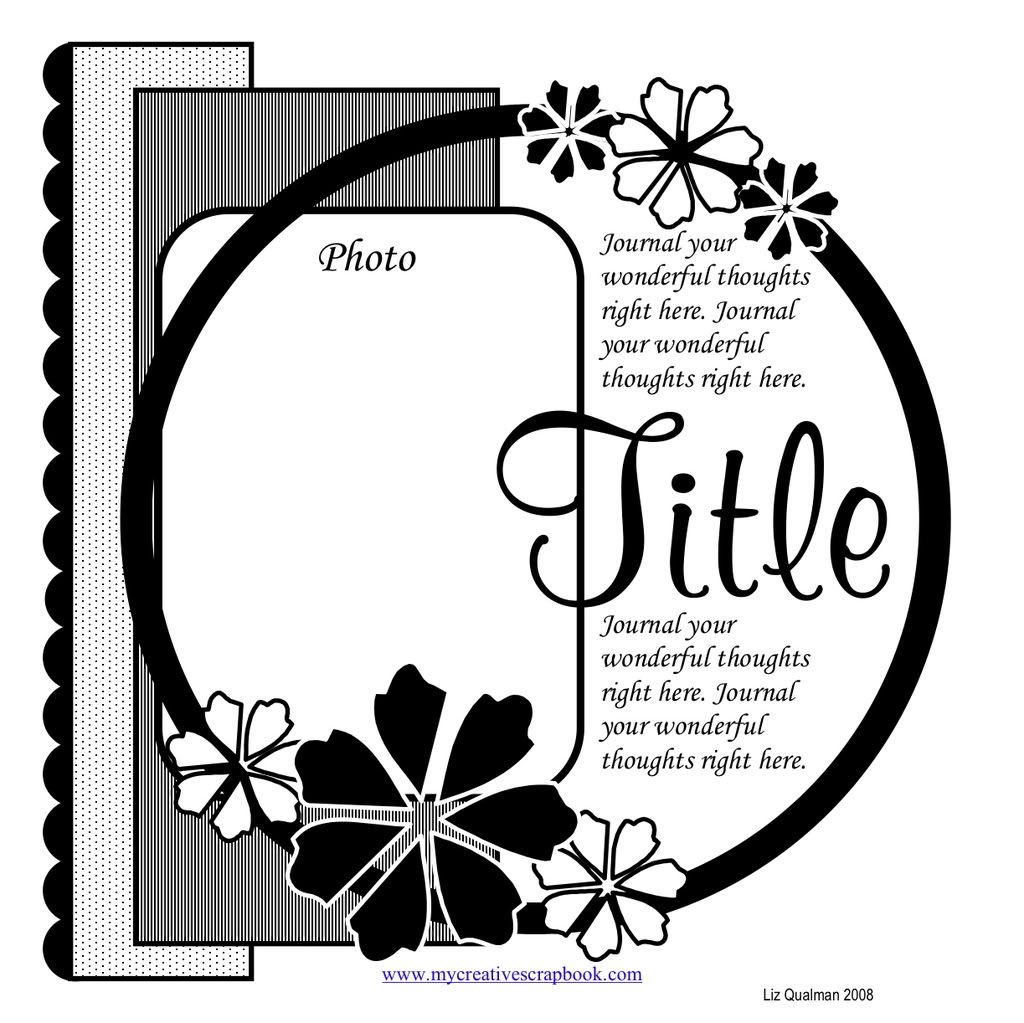
There is a new CHALLENGE up at My Creative Scrapbook for June!!! You can go here for all info: June Challenge. The prizes this month include: AC Thickers, Bling, a Font Folder (alpha rub-ons) and Pattern Paper! All you need to do is complete a layout using this sketch:


You can use any paper or supplies you want - we just want to see what you do with the sketch!!! I'd love for you to participate!


Also, if you haven't seen the kits at My Creative Scrapbook check out the DT Gallery, the girls there ROCK!!!


That's all for now! Have a GREAT WEEK!!!

Wednesday, June 4, 2008

New Stuff, Gift Ideas & More

Got a few projects done. The first is a super quick 6x6 layout for Prima Hybrid. This was sooo easy, I used a predesigned 12x12 digi page, printed it at 6x6 and just added a few real embellishments (flowers, buttons, ribbon and an epoxy sticker). Love how it turned out!


Here's another fun project, but the photo here stinks because there was too much glare on the coffee mug. Anyway, I found these mugs at Hallmark. I've seen them before in other places but they had a good deal on them when I was at Hallmark so I got several (more on the deal later...). The mugs have a removable insert so I made my own insert using Heather Roselli's super cute digi kit at SSD called "Be Happy". More info is here.


Here's a better picture of the insert before I put it in the mug.


After I printed out my design, I traced the existing insert onto my printed page and cut it out to get the right size and shape. Really easy, plus I can make many more of these and change it out whenever I want.

Oh, and here's the info on the coffee mug deal, they are $8.95 at Hallmark (until Father's Day) with your Hallmark Rewards card. You can get the card free online and print it out instantly right here.


And no, I don't work for Hallmark (LOL) just passin' on a deal...

Here's something else I did yesterday, this was a quick mini album for SSD. I LOVE this cute little digi album kit from Mandy called "Nerdy Girl". My daughter's teacher this year sent all the students home with a CD on the last day of school that had pictures from the whole school year. There must have been 75 photos on that CD and it was the MOST AWESOME thing ever!!!! Such a great idea!!! Anyway, I used the photos from that CD to make this. The digi album is all pre-designed so all I had to do was pretty much drag my photos in the photo spots and print. The album was designed at 8x8 so I changed my printer settings to print at 6x6 to fit the BasicGrey "Quarter Pint" Album I used for this project. Here are a few pages:

I added a few traditional embellishments (flowers, ribbon, buttons, etc) to the pages after I printed them.
I photocopied some of her school papers at a reduced size to put on the backs of the album pages.


Well, that's about it for now...I'll be back soon!